Tech Pack in Plain English: What It Is and Why Factories Ask for It
You send a manufacturer a photo, a sketch and a message that says, “Make this, but with a slightly deeper neck.” A few weeks later, the sample arrives. The neck is deeper, but not the way you imagined. The sleeve is longer than you wanted. The fabric feels different from the one you had in mind.
Nobody was careless. You and the factory simply pictured two different garments. A tech pack exists to stop that from happening.
What a tech pack is
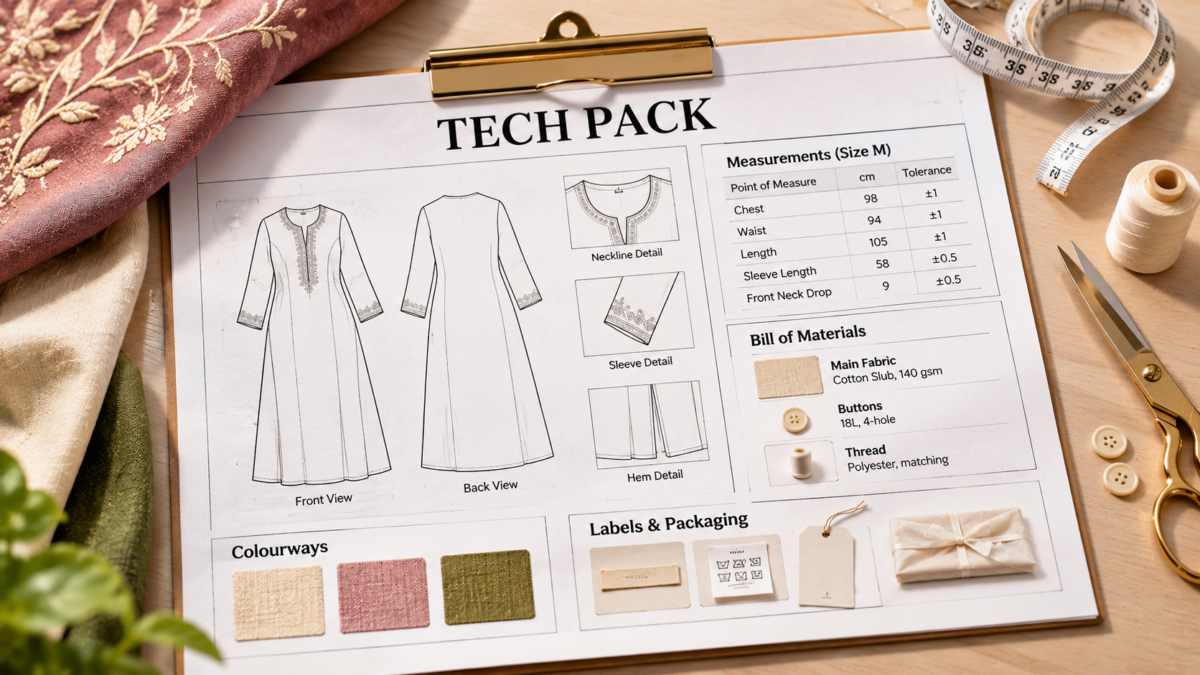
A tech pack, short for technical package, is a document that describes a garment so precisely that a factory can make it without guessing. It combines drawings, measurements, materials and instructions in one place.
Think of it as a recipe. A photo of a cake tells a baker what the result should look like. A recipe tells them what goes in, in what quantity and in what order. A tech pack is the recipe for your garment.
Why factories ask for one
- Accurate quotes. A manufacturer cannot price a garment properly without knowing the fabric, the trims and the construction.
- Fewer sampling rounds. The clearer the instructions, the closer the first sample lands to what you had in mind.
- One shared understanding. The tech pack is the reference both sides can check, so disagreements are settled by the document, not by memory.
- Fair comparison. If you ask several vendors for a quote, a tech pack makes sure they all price the same garment.
- Repeatable results. When you reorder, the same tech pack helps the second batch match the first.
A sample outline you can copy
There is no single official format, but most tech packs cover the same ground. Here is a simple outline for a first-time founder:
- Cover page. Style name and number, season or drop, size range, base size, your brand name and the date.
- Flat sketches. Front, back and side views as simple technical drawings, plus close-ups of details such as pockets, plackets or necklines.
- Bill of materials. Every material used: main fabric, lining, thread, buttons, zips, labels and trims, with a description and the quantity needed for each garment.
- Measurements. The key points to measure on the garment, the target size for each, and how much variation is acceptable.
- Construction details. How it is stitched: seam types, stitch details, hem finishes and any special instructions.
- Colours and prints. Colour references for each colourway and the placement and size of any print, embroidery or embellishment.
- Labels and packaging. Where the brand label, size label and care label go, plus how the garment is folded, tagged and packed.
- Care instructions. Washing and finishing details for the care label.
- Revision log. A short list of what changed between versions and when.
What a measurement table looks like
This is the part that causes the most confusion for beginners, so here is a small illustration. The numbers are made up, for a single size of a kurta top.
| Point of measure | Size M (cm) | Tolerance (cm) |
| Chest | 98 | ±1 |
| Waist | 94 | ±1 |
| Length, shoulder to hem | 105 | ±1 |
| Sleeve length | 58 | ±0.5 |
| Front neck drop | 9 | ±0.5 |
The tolerance column matters. No two garments come out exactly the same, so you are telling the factory how far off is still acceptable. With a number like “neck drop 9 cm, plus or minus 0.5 cm”, the deeper-neck problem from the start of this guide goes away.
How to build your first tech pack, step by step
- Finalise the design. Make a clean flat sketch of each view. Do not start the tech pack while the design is still changing.
- List your fabrics and trims. Note the fabric type, weight and colour, and every button, zip, label and thread.
- Set the measurements. Start with your base size. Add the other sizes once the base fits well.
- Describe the construction. Write how each seam, hem and finish should be done.
- Add colours, prints and labels. Mark where each goes and how big it is.
- Add care and packaging details. They are easy to forget, and expensive to fix after production.
- Review it with your manufacturer. Ask them to flag anything unclear, then save it as version 1 and update the log with each change.
Mistakes to avoid
- Measurements without tolerances. A number with no allowed variation invites argument later.
- Vague materials. “Cotton” is not a spec. Weight, weave and finish change how a garment drapes and feels.
- Missing trims. Buttons, zips and labels are small, but they are a big part of the cost and the finished look.
- Relying on photos alone. A photo shows an idea. It cannot tell a factory how to build it.
- No version control. When changes are not logged, the factory may work from an old file.
- Ignoring shrinkage and wash behaviour. Ask for it to be checked on sample fabric before production.
Do you have to make it yourself?
Not necessarily. Many founders work with a technical designer or a design service to create their tech packs, while others start with a simple version and improve it with each round of sampling. The important thing is that it exists before production starts. A tech pack that is 80 percent complete and honest about what is still open is far more useful than none at all.
Final thoughts
A tech pack will not design your garment for you. But it turns your idea into something a factory can build, and that saves time, money and a lot of frustration. If you are earlier in your journey, our complete guide to launching a fashion brand and our post on why most fashion startups fail are good places to start.
At Dariaan, our Design to Delivery services cover tech packs and CAD visualisation, prototyping, fit optimisation and production support, so your designs reach the factory ready to be made. If you would like help with yours, request a call back and we will talk it through.